Write Offs and Adjustments
Billing > Payments And Adjustments or 
In addition to Payment Posting, the following Transaction Types can be processed in the Payments And Adjustments form:
- CW - Contractual Write Off
- BD - Bad Debt
- FC - Finance Charge
- AD - Adjustment
- AC - Additional Charge
- RF - Refund
Contractual Write Offs
Contract write offs can be taken at the time of Charge Entry or in the Payments And Adjustments form. .
Payments
For entering contract write offs at the time of payment entry, complete the payment entry, then check the Contract box to enable. The Tx Code will default to the Contractual Write Off default code entered inPayer Configuration Overview. (If no default code was entered or the Tx Code needs to be changed, one can be entered manually or selected from the drop down.)
- If a Contract Fee exists for the case and no other contract write-offs have been applied, the Amount will default to the Billed Amount minus the Contract Fee.
- If contract write-offs have been previously applied, the amount will default to the difference between Billed Amount minus Contract Fee and what has previously been applied.
- If the contract write-off was previously entered in full or there is no Contract Fee for the case, the Amount field will be 0.00 , but open to manual entry.

If an additional Contractual Write Off is required, select CW - Contractual Write Off from the drop down on the third adjustment line, enter the appropriate Tx Code, and enter the amount to be written off.

CW Transaction Type
Sometimes Contractual Write-Offs need to be entered without corresponding payments. Examples might be that it should have been done at Charge Entry, but was overlooked, or perhaps an incorrect amount was entered and it needs to be corrected. This can be done on the Payments And Adjustments form by selecting the CW - Contractual Write Off Transaction Type.
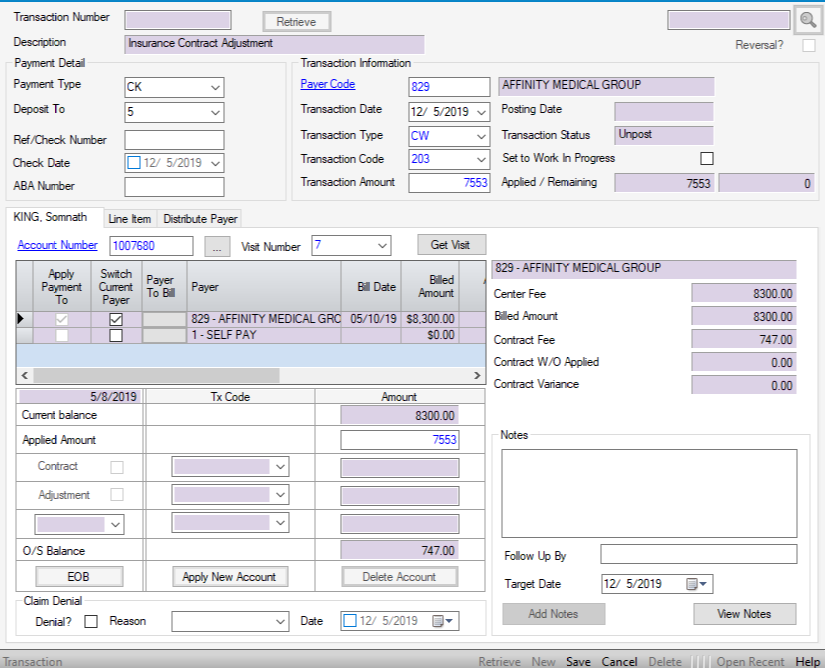
 New on the navigation bar or right click and select New.
Transaction Information section:
- Enter a Payer Code or use the blue hyperlink
 to search by Name, Payer Code, Address Line 1, or Zip Code.
 - Transaction Date will default to the current date but can be edited via manual entry or by utilizing the drop down calendar.
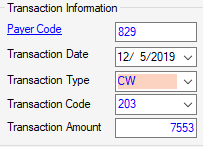
- Transaction Type will default to PY - Payment. Enter CW or select from drop down.
- Transaction Code will populate based upon the default Contractual Write Off code entered in Payer Configuration for the payer selected. If no default transaction codes were entered in Payer Configuration, or a different code is required, enter manually or select from the drop down.
- Enter the Transaction Amount. This will be the amount of the write off, since no payment is being entered. (For even dollar amounts, it is not necessary to enter a decimal point and zeros.)
-
Select the patient by entering the Account Number and Visit Number, then clicking
 , or invoke the Patient Account Look Up by clicking on the
 hyperlink. (The ellipsis to the right of the account number
 is also a hyperlink that will invoke the Patient Account if research is required prior to entering the write-off.)
NOTE: When the account number is entered, the Visit Number will default to the most recent visit. If the write off is for a previous visit, enter the correct visit number or select from the drop down.
- The Current balance for the visit selected will populate as a read only field.
- Enter the Applied Amount. For a single visit , this should be equal to the Transaction Amount previously entered. For multiple visits, enter the amount for the account and visit selected, then select
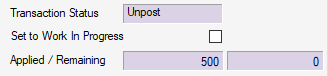
 function key to enter the next Account Number, Visit, and Applied Amount. Status will be set to Work In Progress until total Applied Amounts = the Transaction Amount, at which time the transaction can be saved and posted.
Bad Debt Adjustment
Balances can be written off to bad debt utilizing Bulk Self Pay Transactions, the Collection Tab, or the Payments And Adjustments form. To use the Payments And Adjustments form directly, follow the steps below.
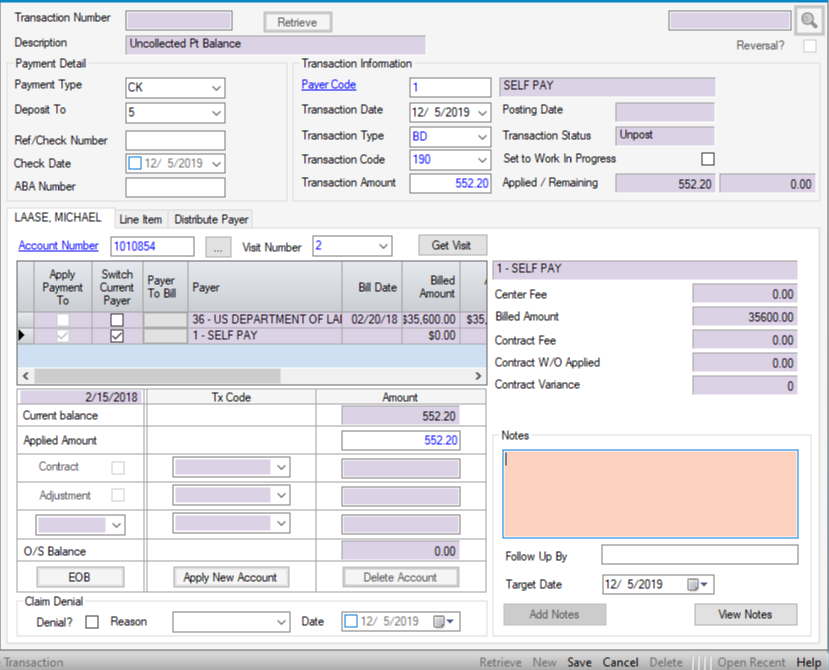
New on the navigation bar or right click and select New.Transaction Information section:
- Bad debt write offs will be predominantly Self-pay, for which the default payer in HST Practice Management is 1. If another payer has been created for self-pay or another payer is being written off to bad debt, enter a Payer Code or use the blue hyperlink to search by Name, Payer Code, Address Line 1, or Zip Code.
- Transaction Date will default to the current date but can be edited via manual entry or by utilizing the drop down calendar.
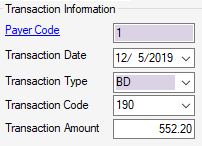
- Transaction Type will default to PY - Payment. Enter BD or select from drop down.
- Transaction Code will populate based upon the default Bad Debt Write Off code entered in Payer Configuration for the Payer Code 1 or the payer selected. If no default transaction codes were entered in Payer Configuration, or a different code is required, enter manually or select from the drop down.
- Enter the Transaction Amount. This will be the amount of the write off, since no payment is being entered. (For even dollar amounts, it is not necessary to enter a decimal point and zeros.)
Select the patient by entering the Account Number and Visit Number, then clicking
, or invoke the Patient Account Look Up by clicking on the
hyperlink. (The ellipsis to the right of the account number
is also a hyperlink that will invoke the Patient Account if research is required prior to entering the write off.)
NOTE: When the account number is entered, the Visit Number will default to the most recent visit. If the write off is for a previous visit, enter the correct visit number or select from the drop down.
- The Current balance for the visit selected will populate as a read only field.
- Enter the Applied Amount. For a single visit , this should be equal to the Transaction Amount previously entered. For multiple visits, enter the amount for the account and visit selected, then select function key to enter the next Account Number, Visit, and Applied Amount. Status will be set to Work In Progress until total Applied Amounts = the Transaction Amount, at which time the transaction can be saved and posted.
-
Finance Charge
Examples of Finance Charges may include interest or late payment penalties. These can be applied utilizingBulk Self Pay Transactions or individually in the Payments And Adjustments form.
NOTE: If charging a percent of the balance due, the Bulk Self Pay Transactions form will calculate this amount. In the Payments and Adjustments form, the amount will need to be calculated in advance as the system will only accept a dollar amount, not a percentage.
New on the navigation bar or right click and select New.Transaction Information section:
- The default Self-pay payer in HST Practice Management is 1. If another payer has been created for self-pay enter that Payer Code or use the blue hyperlink to search by Name, Payer Code, Address Line 1, or Zip Code.
- Transaction Date will default to the current date but can be edited via manual entry or by utilizing the drop down calendar.
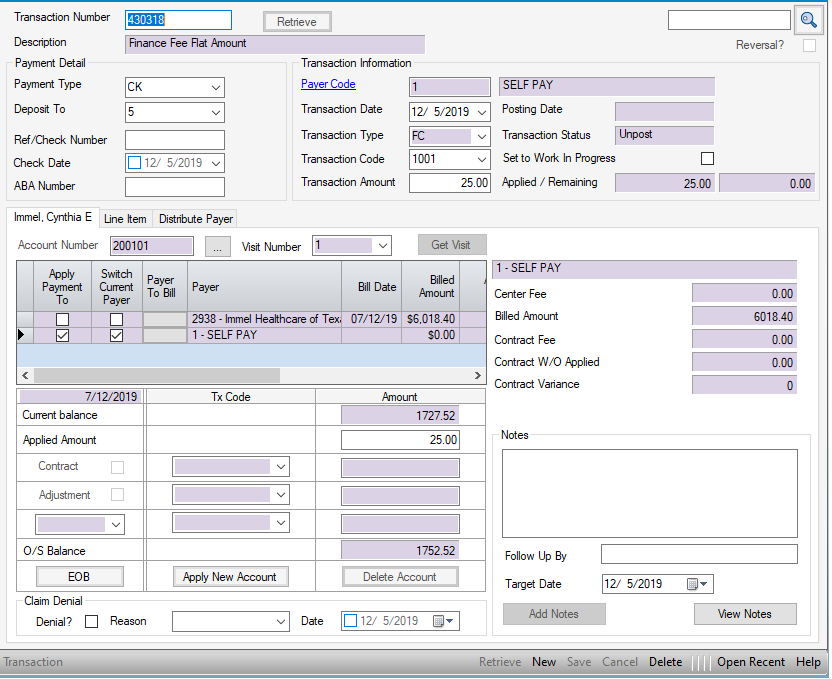
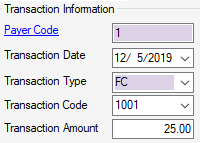
- Transaction Type will default to PY - Payment. Enter FC or select from drop down.
- Transaction Code will populate based upon the default Finance Charge code entered in Payer Configuration for the Payer Code 1 or the payer selected. If no default transaction codes were entered in Payer Configuration, or a different code is required, enter manually or select from the drop down.
- Enter the Transaction Amount. This will be the dollar amount of the Finance Charge since no payment is being entered. (For even dollar amounts, it is not necessary to enter a decimal point and zeros.)
Select the patient by entering the Account Number and Visit Number, then clicking
, or invoke the Patient Account Look Up by clicking on the
hyperlink. (The ellipsis to the right of the account number
is also a hyperlink that will invoke the Patient Account if research is required prior to entering the charge.)
NOTE: When the account number is entered, the Visit Number will default to the most recent visit. If the charge is for a previous visit, enter the correct visit number or select from the drop down.
- The Current balance for the visit selected will populate as a read only field.
- Enter the Applied Amount. For a single visit , this should be equal to the Transaction Amount previously entered. For multiple visits, enter the amount for the account and visit selected, then select Apply New Account function key to enter the next Account Number, Visit, and Applied Amount. Status will be set to Work In Progress until total Applied Amounts = the Transaction Amount, at which time the transaction can be saved and posted.
Adjustment
Adjustments can be entered viaBulk Self Pay Transactions, in the Payments And Adjustments form in conjunction with payments, or in the Payments And Adjustments form sans payments.
Payments
For entering Adjustments at the time of payment entry, complete the Payment Entry, then check the Adjustment box to enable. The Tx Code will default to the Adjustment default code entered in Payer Configuration. (If no default code was entered or the Tx Code needs to be changed, one can be entered manually or selected from the drop down.)

If an additional Adjustment is required, select AD- Adjustment from the drop down on the third adjustment line, enter the appropriate Tx Code, and enter the amount to be adjusted.
AD Transaction Type
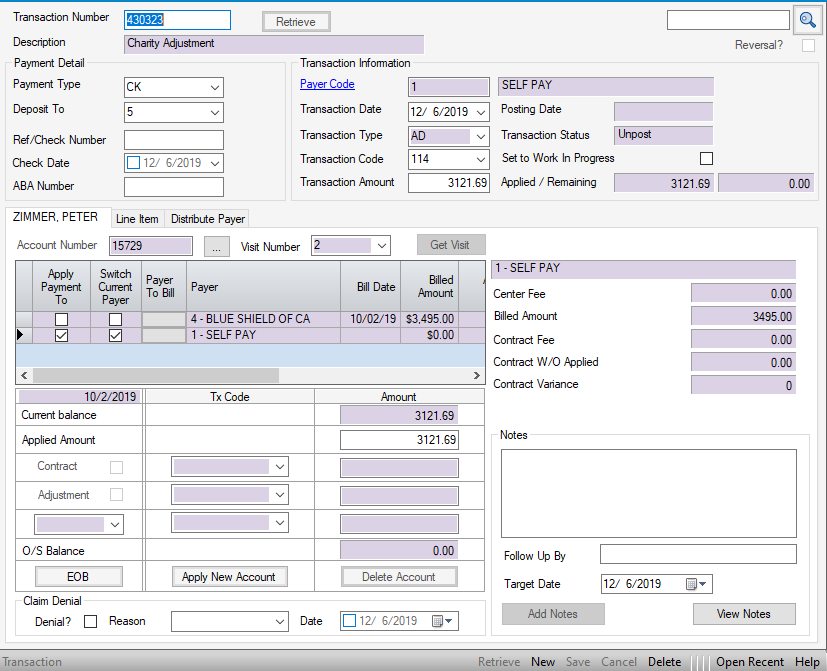
Sometimes Adjustments need to be entered without corresponding payments. Examples might be a charity write off or discount. This can be done on the Payments And Adjustments form by selecting the AD - Adjustment Transaction Type.
New on the navigation bar or right click and select New.Transaction Information section:
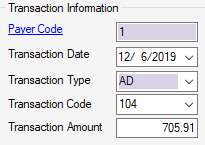
- Enter a Payer Code or use the blue hyperlink to search by Name, Payer Code, Address Line 1, or Zip Code.
- Transaction Date will default to the current date but can be edited via manual entry or by utilizing the drop down calendar.
- Transaction Type will default to PY - Payment. Enter AD or select from drop down.
- Transaction Code will populate based upon the default Adjustment code entered in Payer Configuration for the payer selected. If no default transaction codes were entered in Payer Configuration, or a different code is required, enter manually or select from the drop down.
- Enter the Transaction Amount. This will be the amount of the adjustment , since no payment is being entered. (For even dollar amounts, it is not necessary to enter a decimal point and zeros.)
Select the patient by entering the Account Number and Visit Number, then clicking
, or invoke the Patient Account Look Up by clicking on the
hyperlink. (The ellipsis to the right of the account number
is also a hyperlink that will invoke the Patient Account if research is required prior to entering the adjustment.)
NOTE: When the account number is entered, the Visit Number will default to the most recent visit. If the adjustment is for a previous visit, enter the correct visit number or select from the drop down.
- The Current balance for the visit selected will populate as a read only field.
- Enter the Applied Amount. For a single visit , this should be equal to the Transaction Amount previously entered. For multiple visits, enter the amount for the account and visit selected, then select function key to enter the next Account Number, Visit, and Applied Amount. Status will be set to Work In Progress until total Applied Amounts = the Transaction Amount, at which time the transaction can be saved and posted.
Additional Charge
The most common example of an Additional Charge would be an NSF fee. Additional Charges can also be entered using Bulk Self Pay Transactions.
Additional Charges can be entered via Bulk Self Pay Transactions or utilizing the Payments And Adjustments form.
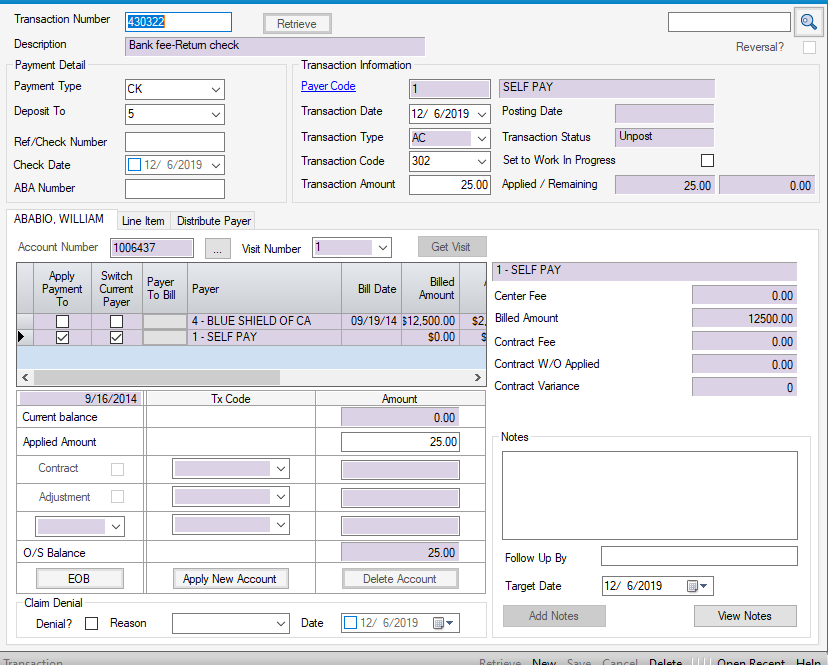
Transaction Information section:
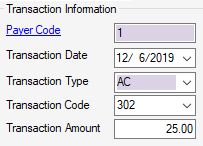
- The default Self-pay payer in HST Practice Management is 1. If another payer has been created for self-pay enter that Payer Code or use the blue hyperlink to search by Name, Payer Code, Address Line 1, or Zip Code.
- Transaction Date will default to the current date but can be edited via manual entry or by utilizing the drop down calendar.
- Transaction Type will default to PY - Payment. Enter AC or select from drop down.
- Transaction Code will populate based upon the default Additional Charge code entered in Payer Configuration for the Payer Code 1 or the payer selected. If no default transaction codes were entered in Payer Configuration, or a different code is required, enter manually or select from the drop down.
- Enter the Transaction Amount. This will be the dollar amount of the Additional Charge since no payment is being entered. (For even dollar amounts, it is not necessary to enter a decimal point and zeros.)
Select the patient by entering the Account Number and Visit Number, then clicking
, or invoke the Patient Account Look Up by clicking on the
hyperlink. (The ellipsis to the right of the account number
is also a hyperlink that will invoke the Patient Account if research is required prior to entering the charge.)
NOTE: When the account number is entered, the Visit Number will default to the most recent visit. If the charge is for a previous visit, enter the correct visit number or select from the drop down.
- The Current balance for the visit selected will populate as a read only field.
- Enter the Applied Amount. For a single visit , this should be equal to the Transaction Amount previously entered. For multiple visits, enter the amount for the account and visit selected, then select function key to enter the next Account Number, Visit, and Applied Amount. Status will be set to Work In Progress until total Applied Amounts = the Transaction Amount, at which time the transaction can be saved and posted.
Refunds
Patient Refunds can also be entered using Bulk Self Pay Transactions. Insurance Refunds must be processed via the Payments And Adjustments form.
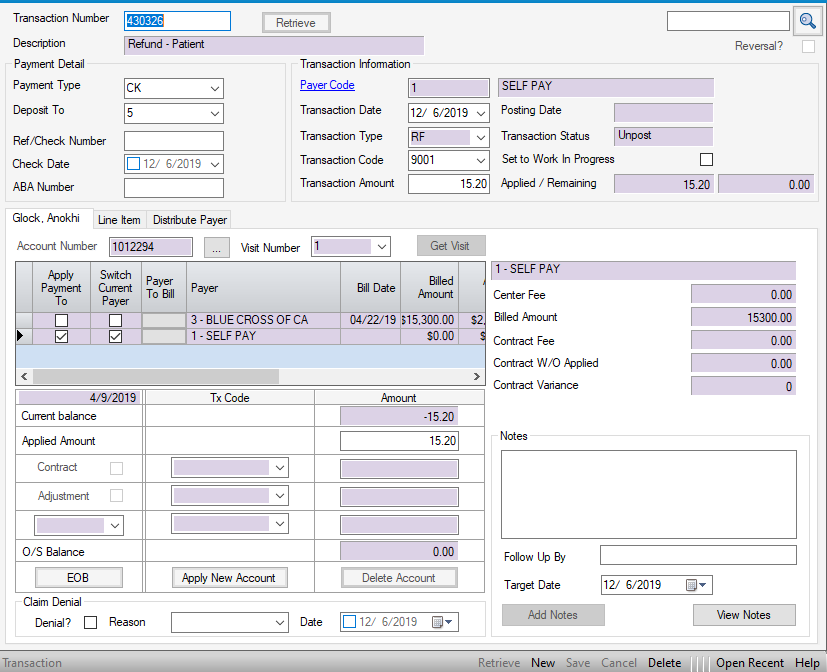
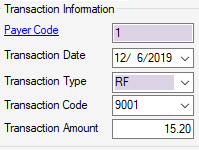
Transaction Information section:
- Enter a Payer Code or use the blue hyperlink to search by Name, Payer Code, Address Line 1, or Zip Code.
- Transaction Date will default to the current date but can be edited via manual entry or by utilizing the drop down calendar.
- Transaction Type will default to PY - Payment. Enter RF or select from drop down.
- Transaction Code will populate based upon the default Refund code entered in Payer Configuration for the payer selected. If no default transaction codes were entered in Payer Configuration, or a different code is required, enter manually or select from the drop down.
- Enter the Transaction Amount. This will be the dollar amount of the Refund. It is not necessary to enter a (-) negative sign. When Transaction Type RF - Refund is selected, the system will apply the transaction as a debit. (For even dollar amounts, it is not necessary to enter a decimal point and zeros.)
Select the patient by entering the Account Number and Visit Number, then clicking
, or invoke the Patient Account Look Up by clicking on the
hyperlink. (The ellipsis to the right of the account number
is also a hyperlink that will invoke the Patient Account if research is required prior to entering the refund.)
NOTE: When the account number is entered, the Visit Number will default to the most recent visit. If the charge is for a previous visit, enter the correct visit number or select from the drop down.
- The Current balance for the visit selected will populate as a read only field.
- Enter the Applied Amount. For a single visit , this should be equal to the Transaction Amount previously entered. For multiple visits, enter the amount for the account and visit selected, then select function key to enter the next Account Number, Visit, and Applied Amount. Status will be set to Work In Progress until total Applied Amounts = the Transaction Amount, at which time the transaction can be saved and posted.